Build your first Alexa skill with Alexa.NET and Azure Functions

I had a chance to play with the Amazon Echo device and I was impressed by the quality of the voice interaction. It motivated me to start building a simple Alexa App. When I first heard the term Alexa Skill, I did not quite get it. Amazon came up with this creative term “Skill”, but it’s nothing but a Voice Assistance App. You can build a wide variety of skills, and the most commonly used one is the custom skill. This includes things like ordering a pizza, booking a ride, or a shopping voice app.
How do Alexa Skills Work?
Our voice request to an Alexa echo is streamed to the Alexa Could Service. This is where the actual magic happens. At Alexa Could Service, the voice stream is translated into text using ASR — Automated Speech Recognition. This text is broken up to identify user intent using NLP — Natural Language Processing. It structures user intent and passes it to the web service (REST API) which processes it and sends the response back. This response text is passed back to the echo device, and it will read it out for you using SSML — Speech Synthesis Markup Language
Here is the step-by-step guide to building a custom skill using Alexa.NET and Azure functions.
You need an Amazon developer account for this. If you don’t have one, create it here.
Build Your Custom Model First
- Log in to your Amazon developer console and open the Alexa developer console. Locate the “Create Skill” button and click it

- Give a skill name (I chose “dot net”) and click on create
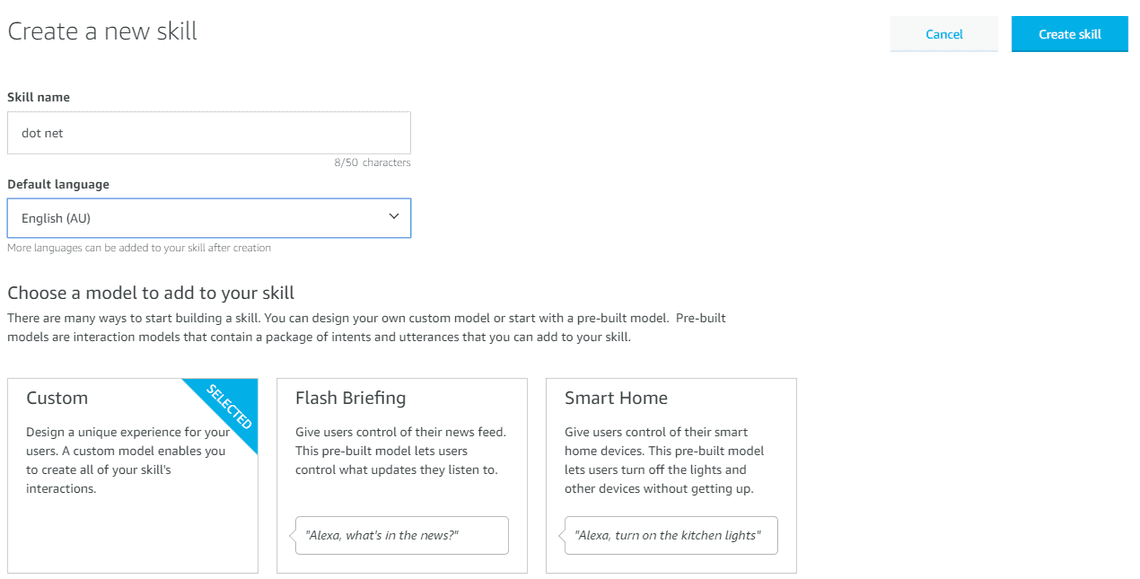
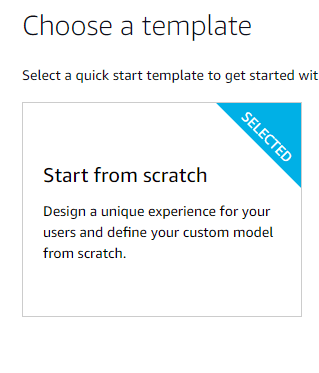
- Keep the default selection (“Start from scratch” template)
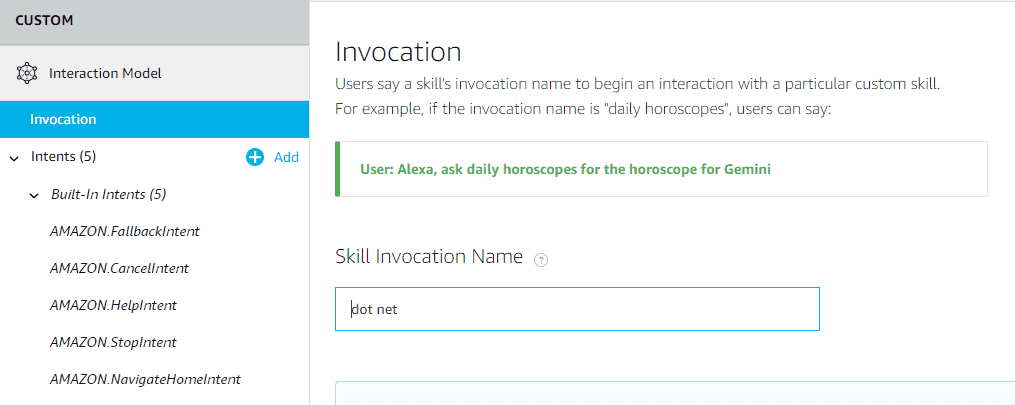
- You will be navigated to the Custom Model build page. Click on “Invocation” in the left pane and leave the name as is. This is the name that will be used to invoke our skills.
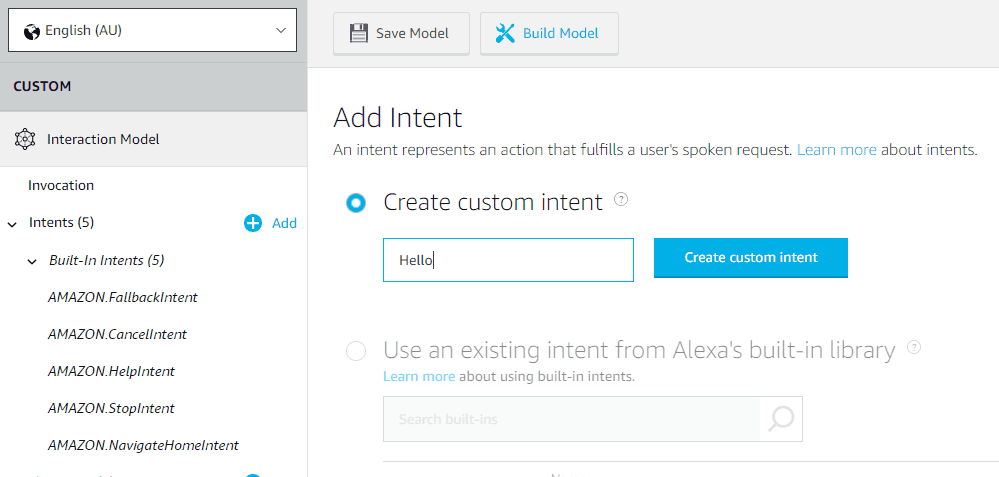
- Click on the “Add Intent” button. This carries the user intention to the back-end service. It could be booking a ride, ordering a pizza etc. You will identify it in the back end and then process it. This one is going to be basic, so name it “Hello”.
- Click on the “Hello” intent and add utterances. When the user says these utterances, it will invoke the “Hello” Intent.
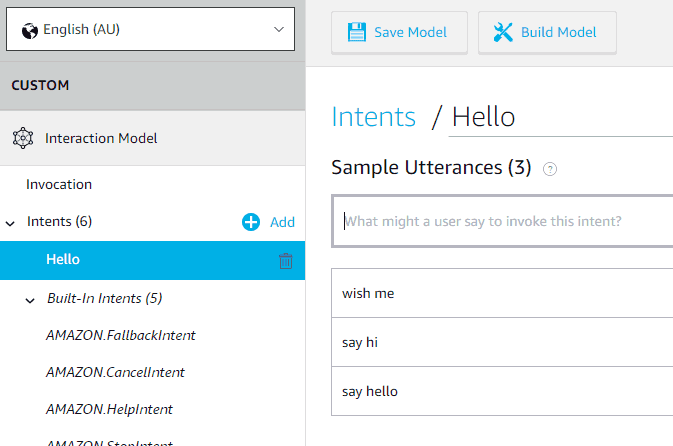
Save the model before we move to the next step
Build an Azure function to handle your Intents
Amazon highly recommends Lambda expressions to process voice commands. At the same time, it also supports the Microsoft ecosystem. Let’s do it with Azure functions.
- Create an Azure function. Select “HTTP Triggers” and set “Access right” as anonymous
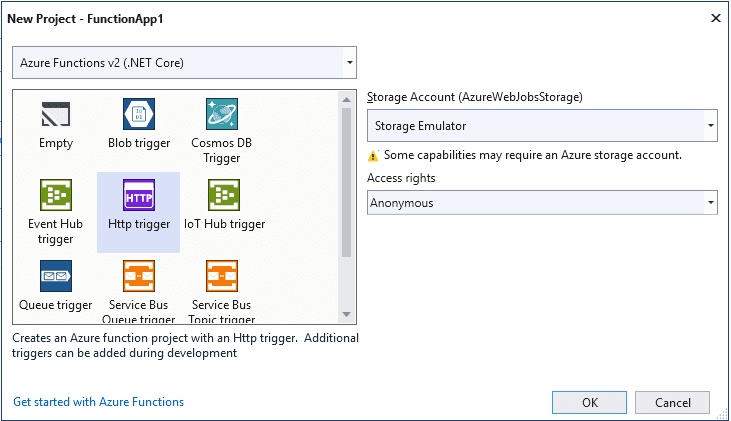
- Open your Azure function and install the Alexa.NET NuGet package

- Paste the below code into your Azure function
[FunctionName("dot-net-skill")]
public static async Task<IActionResult> Run(
            [HttpTrigger(AuthorizationLevel.Anonymous, "get", "post", Route = null)] HttpRequest req,
            ILogger log)
{
    string json = await req.ReadAsStringAsync();
    var skillRequest = JsonConvert.DeserializeObject<SkillRequest>(json);
    return ProcessRequest(skillRequest);
}
private static IActionResult ProcessRequest(SkillRequest skillRequest)
{
    var requestType = skillRequest.GetRequestType();
    SkillResponse response = null;
    if (requestType == typeof(LaunchRequest))
    {
        response = ResponseBuilder.Tell("Welcome to dot net!");
        response.Response.ShouldEndSession = false;
    }
    else if (requestType == typeof(IntentRequest))
    {
        var intentRequest = skillRequest.Request as IntentRequest;
        if (intentRequest.Intent.Name == "Hello")
        {
            response = ResponseBuilder.Tell("Hi dot net Skill!");
            response.Response.ShouldEndSession = false;
        }
    }
    else if (requestType == typeof(SessionEndedRequest))
    {
        response = ResponseBuilder.Tell("See you next time!");
        response.Response.ShouldEndSession = true;
    }
    return new OkObjectResult(response);
}
Integration
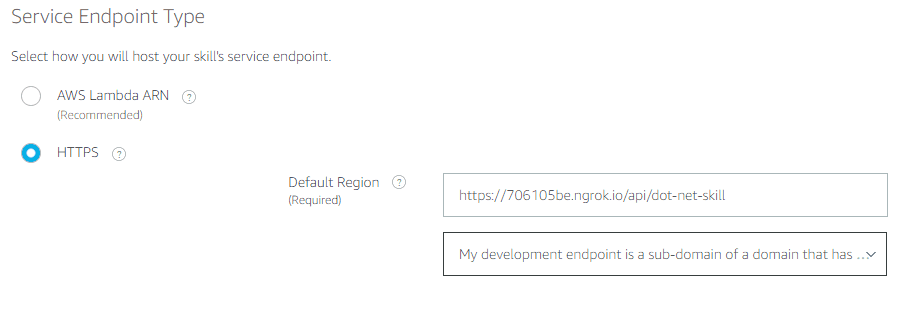
Now you can directly deploy this Azure function, but debugging would be tough. We will use ngrok to expose our port to a public URL and configure this in the dev console so we can debug. Follow my other post on ngrok and get the public URL for your Azure function by ngrok expose your local web server port to the public. This will help you in testing before deploying it to Azure.
Expose localhost as a public URL and debug using ngrok- Once you get the public exposed URL from ngrok, open a custom model and configure the endpoint in the custom model.
Testing
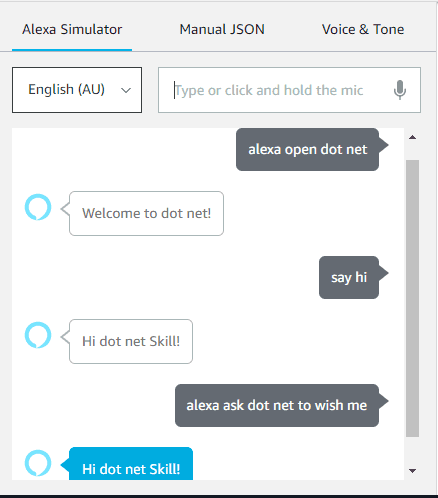
Open the test console and test the skill. It would hit the debugger if you have any in Azure functions.
Newsletter
Related Posts
Legal Stuff

